Posts

Showing posts from 2020

Minor: Linette Hair Model Progress

Image
 This is one of the two hairstyles that I have created for my character Linette. I am still in the process of adjusting it, but I think I have captured the overall shape mostly. I am struggling a little bit as this is my first time modelling hair, but I think I have made good progress so far.        

Minor: René Head Model Progress

Image
 So this is the modelling progress that I have made for my second character of my animation, RenĂ©. I had a little trouble when creating the nose because I designed it to be quite long, but I think I managed to resolve the issue. The only thing left to do now is to model the hair. 

Meg’s Art Jam: Session 3 - All Year Challenge

Image
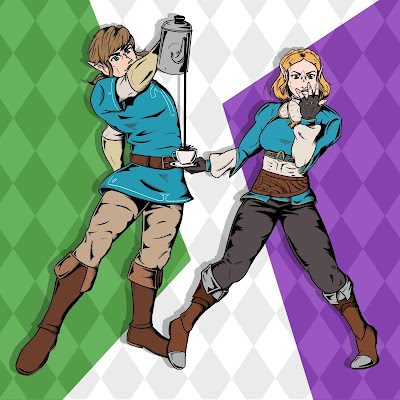
 For this art jam session, Meg gave us a mash up challenge. We were told to take our favourite video game character and draw them doing a particular activity using the art style of our favourite TV show/movie/animation. For my mash up, I chose the characters Link and Zelda (from The Legend of Zelda), the activity was making coffee, and the art style was from one of my favourite shows, JoJo’s Bizarre Adventure. The style of that show is very exaggerated and bold, so I found it a little difficult to interpret but I had a lot of fun. 

Minor: Linette Head Model Progress 2

Image
Here is the further progress I have made with creating the base head model for my character Linette. I have now created a pair of ears, eyes, eyebrows, eyelashes and a throat for her. Because there is going to be a "human" version and a "ghost" version of this character, I now plan to use this base to then create two separate hairstyles and clothes for when I begin modelling the bodies. 

Maya: Photogrammetry - Part 4 Option 1 (Static Match) - Non-Compositing (Single Pass) Integration of Objects

Image
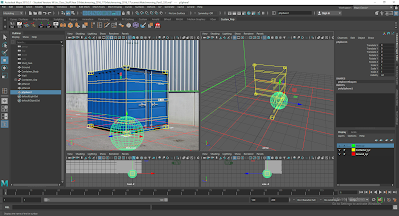
For this tutorial, we used an in-camera method to light and render a set of added objects in the scene. In this case, we used some polygon spheres. This method can be good to quickly create a set of shadows where the additional objects are, however it falls in terms of creating finer detail, such as how it won't be able to match the grain of the ground in the image.

Maya: Photogrammetry - Part 3 Scene Modelling

Image
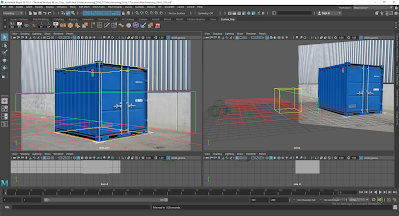
This tutorial was a continuation of modelling the scene in Maya. This was about including more detail in our models as well as creating different attributes for our in-scene camera. There was a lot of fine tuning to be done in terms of getting the camera angle close enough to match the photograph that was edited and imported. It was important that we took our time to get the different shapes and edges into the correct positions.

Maya: Photogrammetry - Part 1 Lens Correction and Part 2 Camera & Scene Matching in 3D

Image
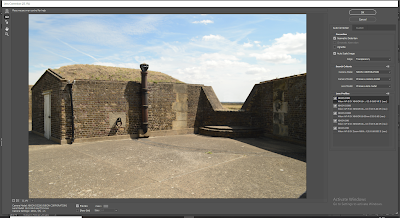
For the Part 1 tutorial, we needed to start off in Photoshop so that we could find out information about the photographs, as well as use the Lens Correction filter to adjust them. This allowed us to straighten the photographs so that we could make them Maya ready so that we can model accurately.         As for the Part 2 tutorial, we then moved over to Maya with our now edited photographs to then begin the scene matching process.   We created a set of shapes and planes in Maya to represent the different elements of the photograph, which will then help create the scene.

Minor: Linette Head Model Progress

Image
In continuation with my Minor project, I have now begun to model one of my two main characters for my animation, Linette. She is a bubbly and energetic character with a sweet and friendly face. I will be using her head as a base for the second version of her model, where she is depicted as a ghost. I started off roughly blocking out the round shape of her face and then further built up the details, such as he long, swooping nose and her big round eyes. It's taking me a little while to perfect her features as they are slightly different from how I depicted her in the orthographs. I feel that he mouth is becoming too wide and I need to adjust the brow area on her forehead. I feel this will improve the more that I progress with the head model.

Minor: Animatic Online Greenlight Review

This is an updated version of my animatic, where I have altered the story to suit my idea better. All music and sound effects are acting as placeholders for the time being. I have also included my project proposal which discusses my intentions for the project and the outcome for my animation.   Love and Beyond Animatic from Chelsea Butler on Vimeo .

Minor: Project Proposal

This is the project proposal document that I have written for Minor. It outlines the intended methods and technologies that I plant to use in order to create my animated short, along with a brief story synopsis.

Minor: Updated Storyboard

This is my updated storyboard for my animated short. I wanted to change the story slightly so that it became more lighthearted whilst still keeping the fundamental elements (the main character being a ghost, a romance involved).

Meg's Art Jam: Session 2 - Ink Blot Challenge

Image
For this weeks art jam session, Meg asked us to get creative using random shapes (like ink blots). With each random shape, we then had to create a character from it. It was a lot of fun experimenting with different designs, and it was a lot more relaxed because we weren't under a time limit like last session.

Meg's Art Jam: Session 1 - Monster Mash

Image
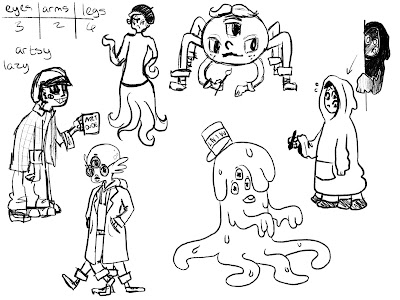
For our first session with Meg, we were challenged with creating a set of monesters using certain requirements. We needed to decide how many eyes, arms and legs our monster designs needed to have, as well as their personality types. Each result was determined using a random number generator. For my monster designs, I needed to include 3 eyes , 2 arms and 4 legs . My monster's personality types were Artsy and Lazy . These are the designs I came up with!

Maya: Rigging Techniques Part 5 - IK/FK Switch

Image
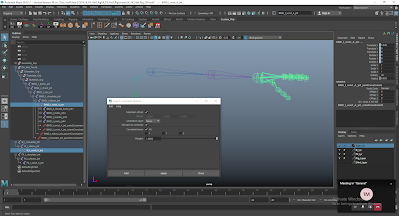
Creating the IK/FK switch was a bit tricky at first. I needed to pay close attention so that I didn't accidentally assign something to the IK when it should've been FK, so it took me a little bit longer to complete, but I got there in the end.    

Maya: Rigging Techniques Part 4 - No Flip Pole Vector

Image
This tutorial was very quick and straight forward. We had to tackle using the node editor again, but I think I'm slowly starting to get used to it now.

Maya: Rigging Techniques Part 3 - Curve Driven Squash & Stretch

Image
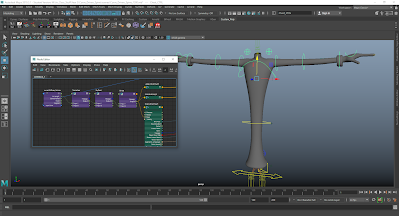
For my first Maya tutorial of my third year on this course, we were tasked with creating a squash and stretch for this model using the spine curve. It was a little confusing at first because you need to pay attention to the connections you're making in the node editor. However, the tutorial was quick and once you know what you are doing, then it is manageable.