Posts

Showing posts from April, 2020

Premise: Love and Beyond OGR

Love and Beyond OGR by Chelsea Butler on Scribd

Premise: Character Design Exploration - Linette

Image
As I did with my other character, RenĂ©, I wanted to do a bit of exploration for my other character, Linette. Below are some mood boards that I put together to help me figure out her design. Much like the celebrity references, I wanted Linette to have a rounded face and a kind smile. She is the type of person who is strong and will fight for what she believes in. I have once again decided to create two types of designs, one more cartoon-y and the other a little more realistic. Linette's main features include her rounded face, her smile, her long swooping nose and her wavy, middle-parted brunette hair. As she is going to become a ghost in my story, I have also added in some designs of her "spirit form" where she is predominantly one colour and translucent.  I gave her a variety of outfit designs where I tried to reflect the fashion of the 1920s to see what she could look like. With her ghostly form, I am unsure whether to have her in a lo

Premise: Character Design Exploration - René

Image
For my Premise project, I wanted to push myself in terms of the character designs. As this story is based on my previous character project, I wanted to develop the style a bit more to suit the romantic atmosphere. I'm starting this design exploration with my character, René, the male lead for my animation. I put together some mood boards for his appearance to get an idea of how he could look. My tutor, Alan, suggested I collect some images of celebrities that I could use as reference and inspiration for his looks. I wanted René to have a soft and kind face, but still quite chiselled to match his aristocratic background. I also wanted to figure out what kind of clothes he would wear, so I sketched some outfit variations, keeping in mind that because he is from an aristocratic family, he would be well dressed in smart suits. I also created some quick colour variations, keeping the palette neutral to represent the era that I'm basing the story in, 1920s France.

Toolkit 2: Maya - Pipeline 1 Skinning - Blending the Lower Body

Image
Now that the blending of the lower body is finished, the skinning process for Jet Pack Jones is complete. I will now move on to adding corrective blend shapes. 

Toolkit 2: Maya - Pipeline 1 Skinning - Blending the Upper Body

Image
Blending the upper body for Jet Pack Jones was quite tricky for me and it took me a while to understand the process. The spine was the most challenging part as I was a bit unsure of how much to blend without the mesh collapsing, but I have managed to complete the tutorial to the best of my abilities. 

Toolkit 2: Maya - Pipeline 1 Skinning - Binding & Weight Grouping the Mesh

Image
The mesh for the Jet Pack Jones model is now bound to the joints. This tutorial was very straightforward, despite the intimidating interface. It's very important to make sure that you select every vertices correctly when binding to the mesh, so this tutorial was good for allowing me to create the habit of double checking everything. 

Toolkit 2: Maya - Pipeline 1 Skinning - Building a Skeleton

Image
I have now created a skeleton ready for the skinning process of Jet Pack Jones. This process was easy enough to do and I am interested in understanding how the head will turn out once we replace the temporary skeleton there. 

Toolkit 2: Maya - Pipeline 1 Skinning - Building a Ribbon Spine

Image
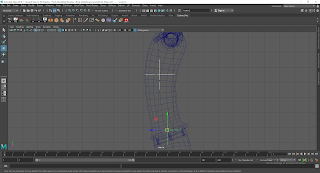
I have now created a ribbon spine for Jet Pack Jones ready for skinning. The tutorial was relatively straightforward, although I had a little trouble towards the end where the geometry became unbound when I skinned the curve to the joints, but I managed to fix it.